Topics
How to Cut Foam for Custom Cushions
By FoamOrder | October 27, 2021 | 7 Minute Read
Home / DIY & How To / How to Cut Foam for Custom Cushions
Get monthly updates on promotions, deals, and new products.
Recommended For You
Topics
By FoamOrder | October 27, 2021 | 7 Minute Read
Home / DIY & How To / How to Cut Foam for Custom Cushions
Get monthly updates on promotions, deals, and new products.
Recommended For You

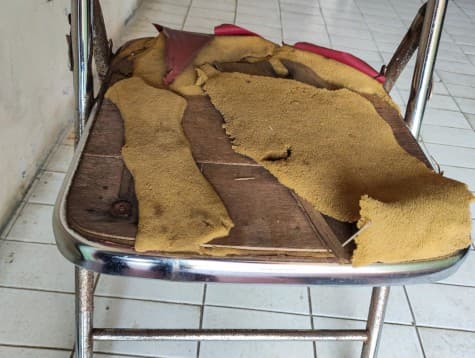
The cushions and pillows inside your home and outside on your patio and porch take quite a bit of abuse. Over time, they can flatten out and become uncomfortable to sit or lie on. Outdoor furniture cushions can also mildew and mold over time, requiring a thorough washing of the fabric covers and replacing the foam with high-quality outdoor foam.
While adding new batting or filler to the cushion top is an option, you may need a new cushion altogether. Making your own DIY bench cushion, seat cushion or bench cushion can be a fun project that also saves money. Knowing how to make a bench cushion also gives you more options for what materials to use. In some cases, crafting your own cushions may be necessary so they fit and feel just right.
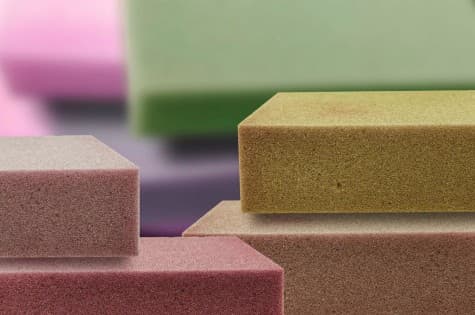
Selecting upholstery foam that provides the right support and feel is the first step. But you’ll need to know how to cut foam for cushions to get the best results. Using the wrong tools and techniques will result in cushions that don’t fit, are misshapen or are uncomfortable to sit on.
This guide to cutting cushion foam will show you how to cut new foam and make your cushions seem new. Whether your cushions have worn out or you’ve bought used furniture that needs a refresh, the team at FoamOrder.com will help you create DIY couch cushions, outdoor ottoman cushions and much more.
When you’re cutting cushion foam, there are a few types of tools you can use. Working from the most useful and complex to the easiest and most simple, here are the tools we recommend for custom-cutting foam cushions.
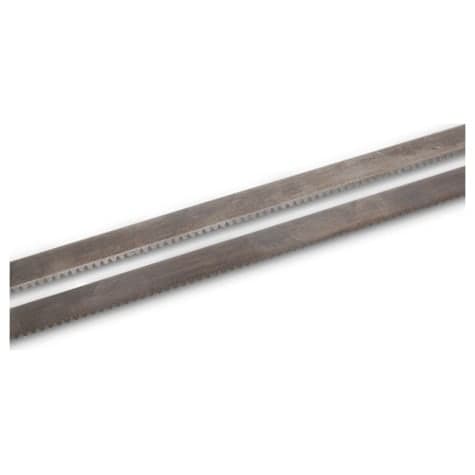
Foam saws and blades are made specifically to cut foam. They are especially useful for very thick foam, more complex cuts and making cushions with complicated or beveled edges. Foam-cutting saws come with a sharp, serrated blade that is extra-long for making deep cuts. The teeth are angled on the side to prevent skidding when cutting through the foam. This is essential when working with dense foam. Though it can be used successfully on softer foams without teeth, the saw blade is staggered and requires a steady hand and good eye coordination. Our partner Upholster.com sells foam saws as well as replacement blades.
The foam carving knife is helpful for jobs that involve cutting both flat and curved surfaces or creating edges. It can be used to cut a new channel where a zipper would be if you add a removable cushion cover. A foam knife is also useful for trimming and adjustments after the initial cut. The knife’s blade length goes from short and stubby, similar to the big razor blade mentioned above, to more dagger-like with teeth on both sides of the blade length.
For simple jobs that require cutting through soft or dense foams, or tough padding materials in general, a sharp serrated kitchen knife is the tool to have. Kitchen knives are designed for quick cuts on softer foods so they won’t damage easily when used correctly. With a precision angle and straight blade line, the serrated knife is perfect for getting into tighter spots that may be difficult to navigate with the tools mentioned above.
Before you start cutting, determine what general shape and size you want your final cut cushion to look like. If your new cushion will be a standard rectangle or square, then accurate measurements and a good piece of foam are all you really need. However, if you’re making a round foam cushion or your desired shape is irregular, you’ll want to cut the foam using a pattern and should follow the simple steps below:
Decide on a final general outer shape for your new foam cushion or pillow. The best way to do this is by using the existing cushion cover if you still have it. Measure from hem to hem to get the outer dimensions and add an extra inch or so to the length and width so your starting foam is large enough. You should be prepared with your new piece of foam in the desired thickness ready to be cut into your specific shape. From there, you can begin measuring out the correct size to make a pattern, ideally on a large piece of kraft paper or bolt of fabric.
To begin making a pattern for a cushion, get a large piece of kraft paper or a large bolt of cloth. You can even tape together a few sheets of newspaper in a pinch. Cut the material out based on the general measurements you made in step one plus 3-5 inches around all the outer dimensions. Then lay the old foam or cushion cover onto the pattern and trace the shape slowly and carefully using a Sharpie or other permanent marker. If you find it easier, you can also place the pattern paper or cloth directly on top of the furniture you are going to make the cushion for and trace it that way.
If you are sending the pattern to FoamOrder.com or a professional upholsterer, be sure to note details directly on to the pattern, such as top vs. bottom (if necessary), where the zipper should go and the thickness of the cushion you intend to buy or make. Finally, cut out the pattern shape along the lines you’ve made.
Now that you have a pattern and a large piece of foam ready to be cut, you can prepare the new foam for cutting. Place the pattern on top of your new foam, follow the pattern with a Sharpie and draw a guide for your cuts onto the material you’re working with. You can use pins or push pins to hold the pattern in place while marking so it doesn’t slip around during this part of the process. When this step is complete, you should see the outline of your new cushion in the correct thickness ready to be cut.
Once your marks are in place, you are ready to begin cutting your new foam. Remember that perfection isn’t required when cutting foam to a pattern; the foam naturally may expand or compress into the shape of your cushion cover and will also often be covered in Dacron or other batting. A variance of up to a quarter-inch is fine as you cut your foam. Depending on how complex your pattern is, you can use the tools mentioned above for cutting. The larger or thicker the piece, the more it will make sense to use a foam saw rather than an electric or plain serrated knife.
Once you’ve finished cutting everything out, test it all around the piece(s) of furniture where you’re adding new foam padding or inserts. Make any necessary adjustments so your shapes fit correctly and don’t cause problems with the way your cushion fits into place if they don’t line up properly.
Because foam is generally inexpensive, if you’ve made your foam piece too small, you can start over again or glue on an additional piece of foam using foam glue. Remember that an outer layer of batting can hide seams as long as the foam is glued together thoroughly. If your cut is too large, you can easily trim it down with the tools identified above.
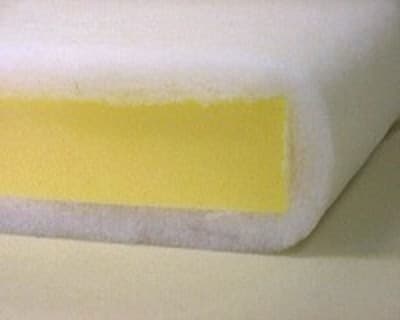
After making any necessary adjustments to your foam pieces, you generally want to apply a layer of polyester, cotton or wool batting to your foam. The batting serves two purposes. First, it allows the foam to easily slip inside the cover. Second, batting provides the puffy, comfortable look that most interior cushions have. We recommend a batting “book wrap” for standard cushions, although some people like to apply batting to all sides of the cushion.
To make a cushion book wrap, start by cutting the batting to a size slightly larger than the combined size of the top, bottom and front of your cushion. Then wrap the batting around these three sides before gluing it on. Finally, trim it to the exact size of your cushion with sharp household scissors. You can attach the batting with a light coating of any spray glue.
Down Envelopes: If you are looking for an extra layer of luxury to your cushions, you can consider down or poly-fill envelopes to your foam. This can be a bit more complicated than batting, and you will likely need to trim your foam an additional inch or so on all three dimensions for it to still fit correctly in your cushion covers. We recommend seeking the advice of an expert if you want to try this added step.
Once your foam cushions are cut and shaped perfectly and Dacron has been applied, all that’s left is to put your covered foam back into the original cover. Most slip-covers have a zipper on the back; you should be easily able to slip the new cushions into the cover with the batting side facing front away from the zipper.
If you have a more complex shape, you may need to work the foam into the cover by pushing and pressing it and letting it re-expand. For very difficult situations, putting a plastic bag around the foam (and even vacuuming down the volume as you insert the foam) can help. The plastic can be removed after the foam is fully installed into the cover. Finally, make sure the edges of your foam are lined up on all sides with the seams of the cushion cover and put the cushion in place on your chair or couch. Now sit back, relax and enjoy the fruits of your labor!


